As I mentioned last week I am in the process of decorating my new house. It has been going on for 5 months and I finally completed one room, the guest bedroom! So here is the big reveal!
Before you look at what I have done and if you haven’t seen it yet, feel free to check out my inspiration post for this room. I wanted to create a neutral, yet stylish, little nest where our guests could relax. I didn’t want to make any big statement in this room as it will be mainly used by my family and friends who may have very different tastes and who will want a calming space to rest after long days walking around London.
So without further ado, here is a little before and after!


A positive change I believe! 🙂
Now let’s go into the detail.
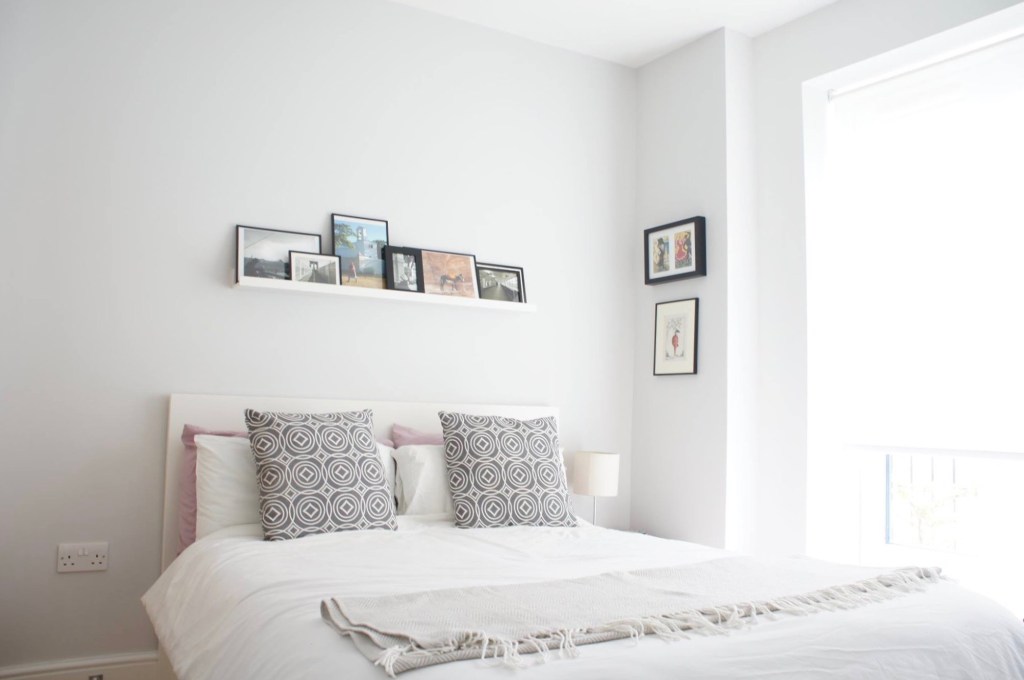
As you can see, the new colours really brighten the room which was essential as this bedroom gets no sun during the day. The white and pale greige work as panel-lights brightening up the whole room.

The space being quite small, I created depth using two paints colours. On the back wall, I used Polished Pebble by Dulux in order to make the room look slightly longer than it is. I also knew that I would have a white bed-frame and wanted to create a contrast with the wall to avoid a ‘clinical look’. On the other walls, I used White Mist by Dulux, a cool off-white.

The double bed is from Ikea and has plenty of storage. This was essential for us as it seems no new-build in England comes with decent storage. The mattress is very comfy and from Ikea as well. The bedside table is from Ikea too… Disclaimer – This post is NOT sponsored by Ikea.

The lampshade is from Next and the bedside table lamp from Argos (old collection, similar here)

All the bedding is from Marks & Spencer and the decorative cushions are from Homebase (I bought those 4 years ago so not sure they are still available). The throw is from Primark (old collection).

For the decor, I wanted to display some of my pictures as well as a few items I collected other the years without overcrowding the walls. A picture ledge (from Ikea!) seemed like the best way to achieve this look. All the frames are from Flying Tiger and T.K. Maxx

The window was a project on its own! On the picture it looks like a regular white window frame, right? Well, scroll back up to check the before picture, you will notice that it was navy blue. In order to really make the room brighter, I repainted the inside of the frame white so it wouldn’t clash with the brightness of the walls. In order to do so, I sanded the wood frame, applied 2 coats of primer and 2 coats of white satin paint. It was painful and wouldn’t do it again but it really worth it I think!
Finally, the biggest challenge was to give privacy to the room without making it darker. I, therefore, order a ‘magic’ blind from Blind2Go. It is brilliant! You still get all the outside light and able to see through without anyone being able to peek inside.
Unfortunately, I am not completely done as you can see in the pictures below.
So still to be done:
- I want to find a vintage storage box to store things above the wardrobe

- I will add a shelf above the radiator to display books, maybe a little plant too? So that Audrey doesn’t feel too lonely.

Here you go guys, I hope you enjoyed that lengthy post! I will make sure to give you an update once I have completed the few outstanding tasks!
Follow me on Instagram, Twitter, Pinterest, Youtube and Trover!

Leave a reply to JENNY KAKOUDAKIS Cancel reply